


During April and May 202, Women who Code collaborated with Reach platform for a Bounty hack on Algorand Blockchain. This report concerns what I built, the obstacles, and technologies used.

The Algorand blockchain
Algorand is a blockchain created in 2017 by Silvio Micali that uses a Proof of Stake protocol with a native cryptocurrency called ALGO. For all miners, the number of blocks produced by each and the weight of their votes is proportional to the amount of currency they hold. Anyway, its implementation makes it economically undesirable for a participant with a lot of investments to produce an attack that devalues Algorand.
Algorand’s blockchain network was designed to improve efficiency and transaction speed, intending to cut down massively on transaction costs. It is also a smart contract platform, meaning blockchain developers can use it to build DeFi applications, create NFTs, and build decentralized applications (DApps).
A word about Reach
Reach is a crypto startup, aiming to simplify decentralized app development across blockchain platforms with its developers’ platform.
With a generalized backend language Reach can serve Ethereum and Algorand, and uses “connectors” to translate this backend language to the correct bytecode. Additionally, its backend supports the ability to specify blockchain-specific functionality.
The compiler ensures that the dApp is free from errors without having to write tests of what the program should do. Instead, developers write down what their program must not do. By operating at this higher level of abstraction, developers are not responsible for determining the state space of the smart contract, unlike during development with Solidity.
Building a Microblogging service w/ Reach on Algorand
Let’s go building! As topic, I chose to implement a Microblog in which members can post and subscribe to various content streams and the app is called meow. Follow the quick start guide to get your development environment set up and your tools and dependencies installed.
Building the backend
A Reach backend (written in a .rsh file) names explicitly the various participants in a dApp and their individual workflows as a single chronological workflow that shows how and when the different workflows intertwine. Let’s start with defining the participants and their executable methods, the creator of a microblog, and the subscriber who will be consuming the microblog’s content created by the blog owner.
Participant('Creator', {
      meow: Fun([], Bytes(500))
    })

...

ParticipantClass('Subscriber', {
      got: Fun([Object({
        text: Bytes(500),
        owner: Address
      })], Null)
    })
A fundamental concept in Reach is that the application starts in a detached perspective called a step where each participant acts independently. After accumulating these independent steps, participants must agree on the computation, called a consensus step.
The first consensus step in the program flow for meow is the program's initialization when the Creator deploys their microblog.
A.publish();
For the microblog to be persistent, it has to run in a loop; this is what we are implementing next. This is how the program is able to wait for the participants to act.
A Reach step occurs in the continuation of an init statement or commit statement. A relevant step is the publishing of a message (or blog post) by the Creator, accompanied by the owner address as a piece of additional information. Inside of a local step, this refers to the participant performing the step.
The interaction expression is bound in the participant interact interface and - in this case - the Subscriber receives and reads the microblog post published by the Creator.
When complete, the loop continues and waits for either a Creator’s or Subscriber’s interaction.
var [shouldContinue] = [true];
      invariant(balance() == 0);
      while (shouldContinue) {
        commit();

        A.only(() => {
          const meow = declassify(interact.meow());
          const owner = this
        });
        A.publish(meow, owner);

        B.interact.got({
          text: meow,
          owner: owner
        });

        continue;
      }
Building the frontend(s)
Frontends for Reach are implemented in JavaScript or via the the RPC server and one of the languages with an RPC client: C#, JavaScript, Go, and Python.
Frontend #1: Command-line app in Javascript
Reach platform enables you to write a CLI-based frontend in JavaScript that works very well as a testing application before implementing the actual web app. For the .mjs-file we import an instance of the reach stdlib (standard library), which contains utility functions that can be called from the frontend. For instance, we can create an Algorand test account, and in this basic example, this account will do both blogging and consuming (their own) blog posts.
const acc = await stdlib.newTestAccount(startingBalance);
Additionally, we implement a createStream()-function that triggers the initial contract deployment by the contract owner class and lets the subscriber connect to it by using the contract’s info generated.
const createStream = async () => {
  const isBlogOwner = await ask(
    `Do you want to create a blog?`,
    yesno
  );
  const who = isBlogOwner ? 'Owner' : 'Subscriber';

  console.log(`Starting as ${who}`);

  let ctc = null;
  if (isBlogOwner) {
    ctc = acc.contract(backend);
    backend.Creator(ctc, Creator)
    console.log('Deploying Blog...');
    const info = JSON.stringify(await ctc.getInfo(), null, 2);
    console.log('Contract info. Subscriber need this to connect..')
    console.log(info);
  } else {
    const info = await ask(
      `Please paste the contract info of the blog you want to subscribe to:`,
      JSON.parse
    );
    ctc = acc.contract(backend, info);
    backend.Subscriber(ctc, Subscriber);
    console.log("...Successfully Connected...")
  }
};
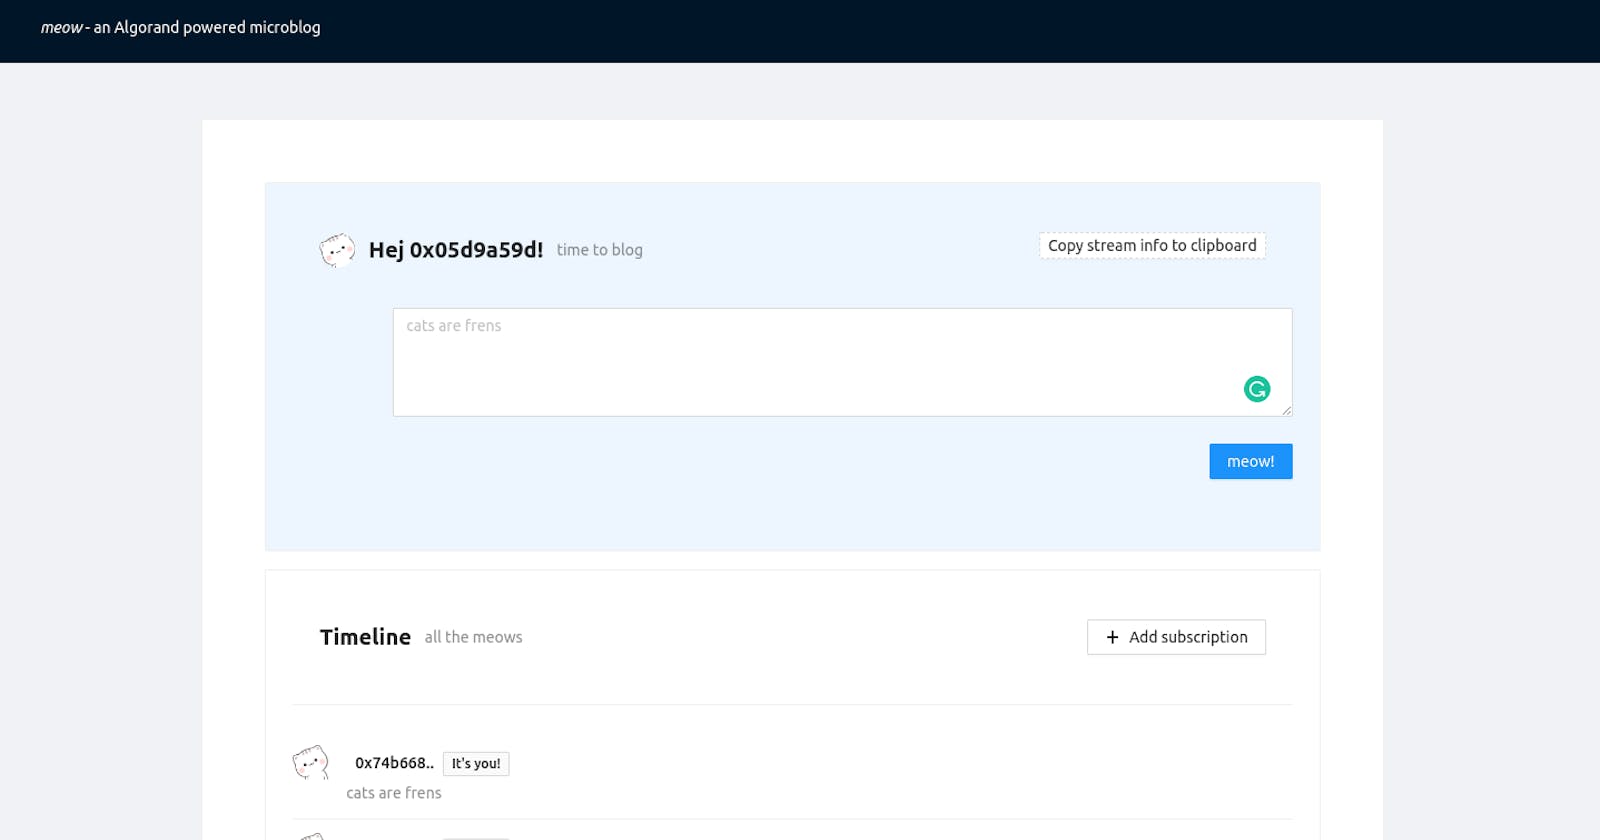
Frontend #2: React web app
To start quickly with building a React powered web app for Reach, you could execute reach react, which will compile a program starting at index.js, running on an appropriate devnet and mounting/running the current directory into /app/src/ with Docker. Alternatively, you can start with any React setup you prefer, e.g. create-react-app for starting straightforwardly. Deploying and interacting with the backend can be made possible by importing the compiled build/index.main.mjs JavaScript file and the '@reach-sh/stdlib' JavaScript library.
Typical to Web3 applications, the user will first be asked to connect their wallet, preferably MyAlgoConnect.
async componentDidMount() {
    const acc = await reach.getDefaultAccount();
    const balAtomic = await reach.balanceOf(acc);
    const bal = reach.formatCurrency(balAtomic, 4);
    this.setState({ mode: 'Start', acc, bal });
  }
And just like in the CLI-based app the user accessing the application can either take the role of the Creator, who will be able to deploy/publish his/her microblog and start “meowing”, so blogging.
async deploy() {
        this.setState({ mode: 'BackendRunning' })
        const ctc = this.props.acc.contract(backend)
        backend.Creator(ctc, this)
        const ctcInfoStr = JSON.stringify(await ctc.getInfo(), null, 2)
        const ctcInfo = await ctc.getInfo()

        this.setState({ mode: 'BackendRunning', ctcInfoStr, ctcInfo: ctcInfo })
    }

    async meow() {
        const meow = await new Promise((resolveMeow) => {
            this.setState({ resolveMeow })
        })
        return meow || 'Test'
    }
Additionally, we’ll implement the Subscriber’s behavior: They will first need to subscribe to a microblog by entering the contract’s info. After that, new posts will show up automatically in the timeline.
async runBackend(ctcInfoStr) {
        this.setState({
            isModalOpen: false,
        });
        const ctcInfo = ctcInfoStr && JSON.parse(ctcInfoStr);
        const ctc = this.props.acc.attach(backend, ctcInfo);
        const interact = {
            got: ({ text, owner }) => {
                this.setState((prevState) => ({
                    meows: [...prevState.meows, { text: text, owner: owner }],
                }));
            },
        };
        await backend.Subscriber(ctc, interact);
        this.setState({ mode: "DisplayInfo" });
    }
For more insights, have a look into the Github repository!